If you take a lot of photos, you need a safe place to store them. A NAS (Network Attached Storage) is like your own private cloud at home. It keeps your photos in one place, easy to access from any device, and adds an extra layer of safety when combined with cloud backup.
My old NAS worked for years, but it started slowing down and the hard drives were getting old. That’s risky because if a hard drive fails, you could lose everything. So I upgraded to a new model that’s faster, safer, and ready for the future: the Synology DS925+.
What makes this NAS great for photographers
- Holds up to 4 hard drives for plenty of photo storage
- Can expand later if you need more space
- Has slots for super-fast SSDs to speed things up
- Memory can be upgraded for better performance
- Comes with a 5-year warranty
Setting it up
Installing the hard drives and memory was simple. The NAS also supports replacing a hard drive while it’s running, which is great if one fails. Synology’s setup tool guides you through everything, so you don’t need to be a tech expert.
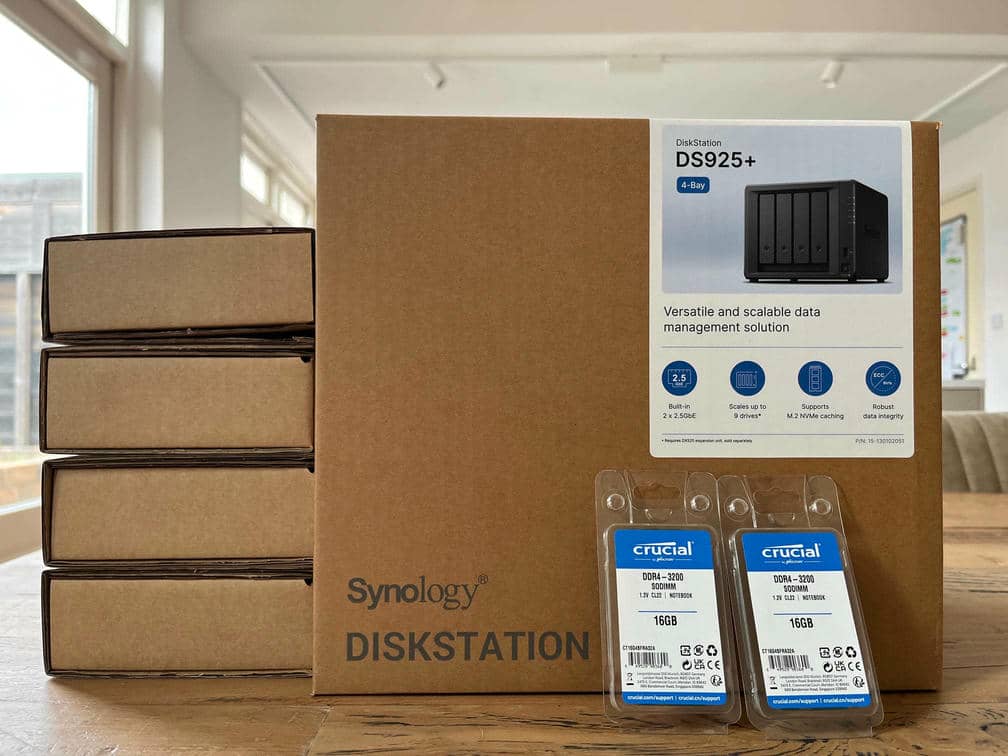
Synology DS925+ NAS with four hard drives and upgraded memory ready to be installed.

Close-up of Synology 4TB hard drive being unpacked for NAS setup.

Standard 4GB memory module installed.

Two 16GB memory modules installed inside NAS for better performance.

Hard drive mounted in NAS tray ready for installation.
Why a NAS with 4 hard drives?
Storing all your photos on one hard drive is risky because if that drive fails, you could lose everything. I wanted a solution that gives me peace of mind. A NAS with 4 hard drives lets me use RAID, which spreads your photos across multiple hard drives in a smart way. If one hard drive breaks, your photos are still safe.
What is RAID?
RAID stands for Redundant Array of Independent Disks, but don’t worry about the name. Think of it as a way to make your photo storage safer and sometimes faster by using multiple hard drives together.Imagine this
You have thousands of photo albums. If you keep them all in one box and that box gets damaged, you lose everything. RAID is like spreading those albums across several boxes in a smart way so you don’t lose your photos if one box breaks.The most common RAID types for photographers
- RAID 1 (Safety first) Makes an exact copy of your photos on two hard drives. If one fails, you still have the other. Best for: Simple protection.
- RAID 5 (Balance of speed and safety) Uses at least three hard drives. It spreads your photos and backup info across all hard drives. If one fails, your photos are still safe. Best for: Most NAS setups.
- RAID 6 (Extra protection) Like RAID 5 but can handle two hard drive failures. Needs at least four drives. Best for: Large photo libraries.
Important
RAID protects you from drive failure, not from mistakes. If you delete a photo, it’s gone everywhere. That’s why you still need a backup plan.The 3-2-1 Backup rule
Think of it as your safety net for photos. It means:- 3 copies of your photos One main copy and two backups.
- 2 different places to store them For example, your NAS and an external hard drive.
- 1 copy stored somewhere else Away from your home or studio, for example in a cloud solution.
Final Thoughts
A NAS is perfect for photographers who want peace of mind. It keeps your photos safe and easy to access without tech headaches. Just remember: RAID helps protect against drive failure, but you still need a backup plan.What do you use to store your photos? Share your setup in the comments. I’d love to hear your tips.Not sure if you really need backups?
Check out my article “Backups, do I really need them? Or do I?” and find out why every photographer should have a plan.

Backups, do I really need them? Or do I?
In the past, before everyone was connected to the internet, making backups was mainly important for businesses. After all, mistakes happen and hardware doesn’t last forever. At some point, digitization accelerated, and a new kind of network was built on a massive scale. Initially, it was only available to governments, businesses, and campuses, but later it was also made available to individuals. This network is better known as the internet. Nowadays, we share everything with